
Gaze Tracking
This page explains how to set up the Gaze Tracking feature (added in iPadOS 18) to play Mouse & GazeGame.
Adjusting both iPad settings and in-app settings is the key to using gaze tracking smoothly.
iPad Settings
Section titled “iPad Settings”The steps below are based on iPadOS 18.5.
1. AssistiveTouch Settings
Section titled “1. AssistiveTouch Settings”Open the Settings app and go to:
Accessibility → Touch → AssistiveTouch
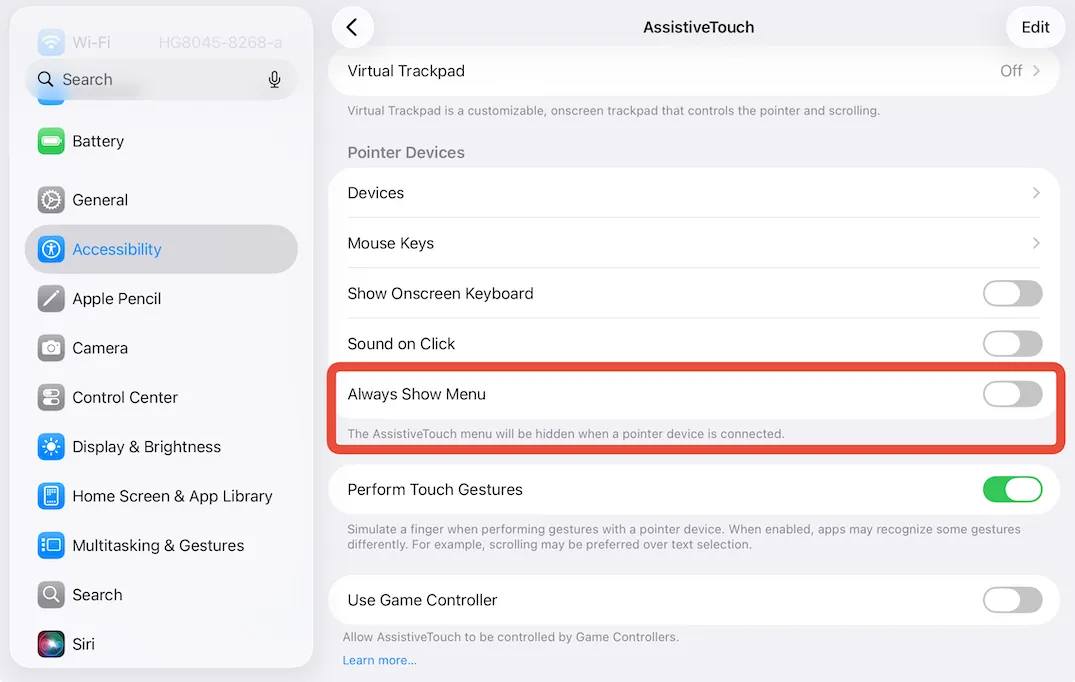
Turn off “Always Show Menu”.
2. Gaze Tracking Settings
Section titled “2. Gaze Tracking Settings”Accessibility → Gaze Tracking
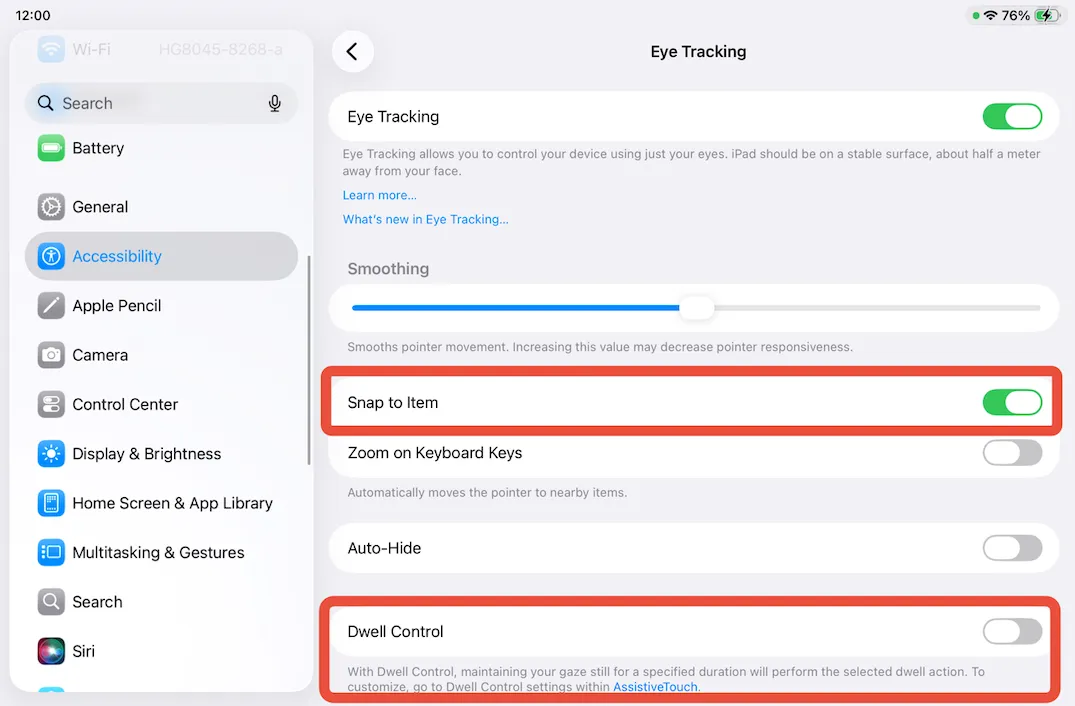
- Turn on Gaze Tracking (calibration starts automatically).
- Turn off “Snap to Items”.
- Turn off “Dwell Control”.
In-App Settings
Section titled “In-App Settings”App-Wide Settings
Section titled “App-Wide Settings”Tap the button at the top-left of the screen to open the settings.
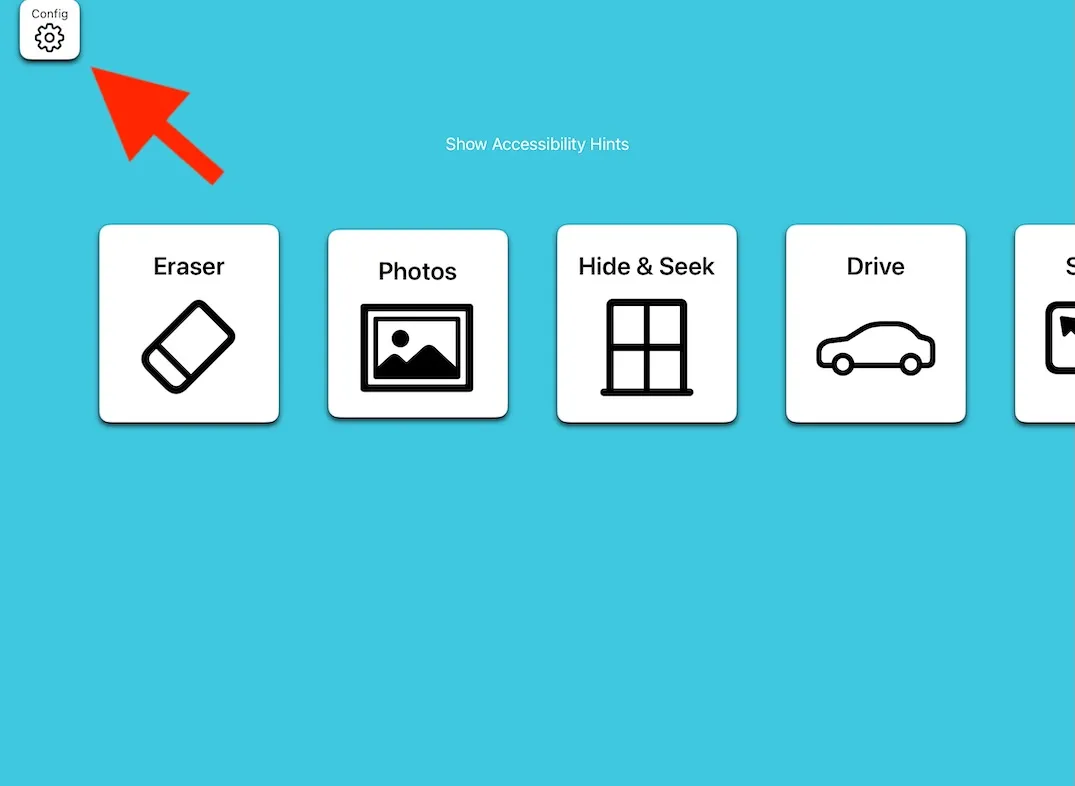
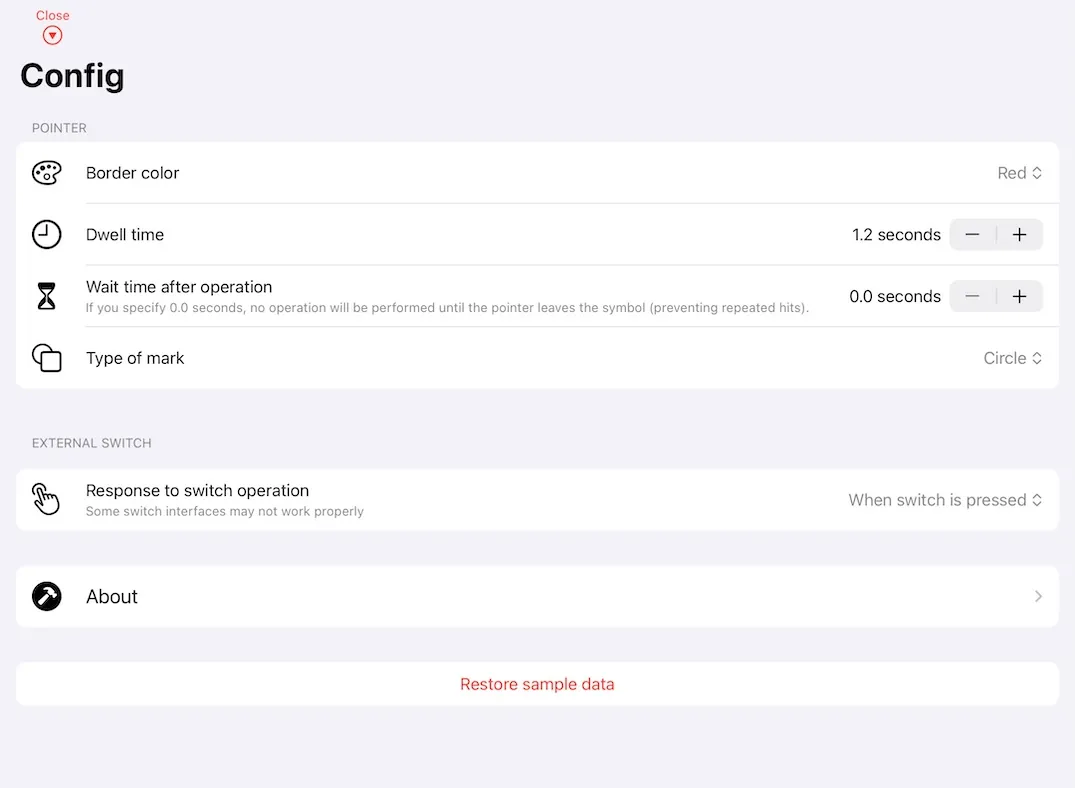
You can change the border color and dwell time.
Per-Game Settings
Section titled “Per-Game Settings”Hide & Seek, Drive, Sticker, and Demon Buster each have their own input settings.
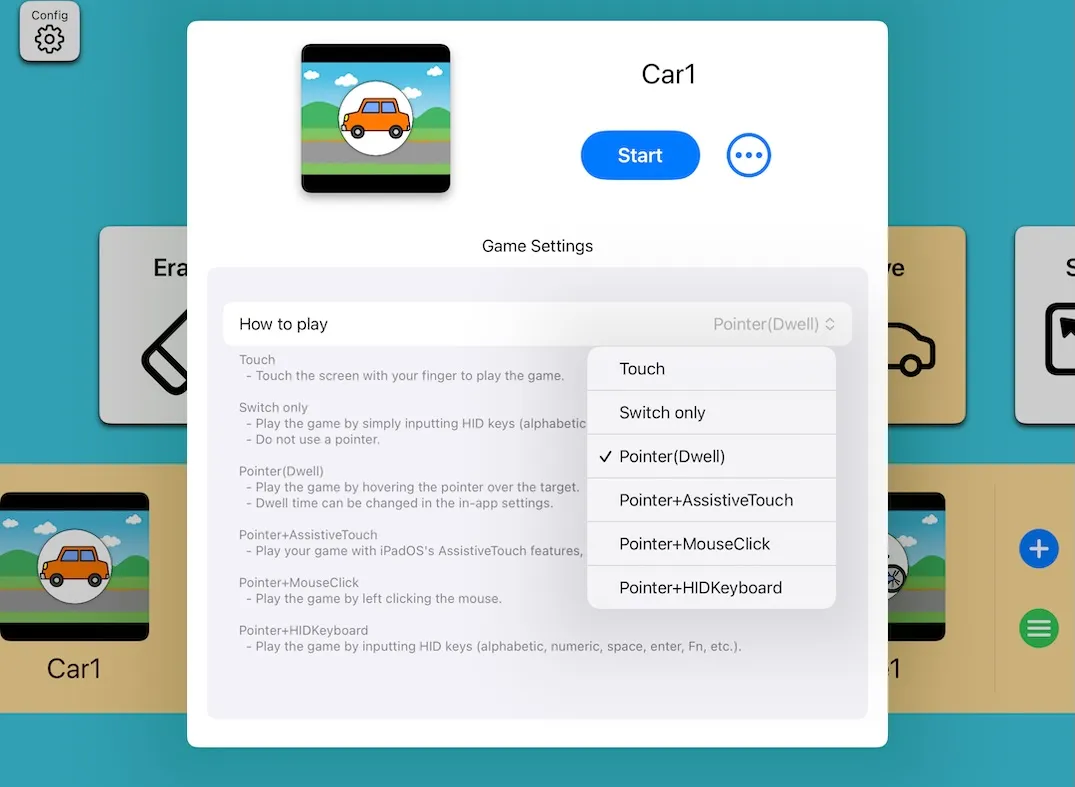
- Pointer only: select “Pointer (Dwell)”
- Pointer + Switch: select “Pointer + Switch” or “Pointer + Left Click”
Eraser and Photos have no input settings to configure — they are the easiest games to start with for gaze tracking.